


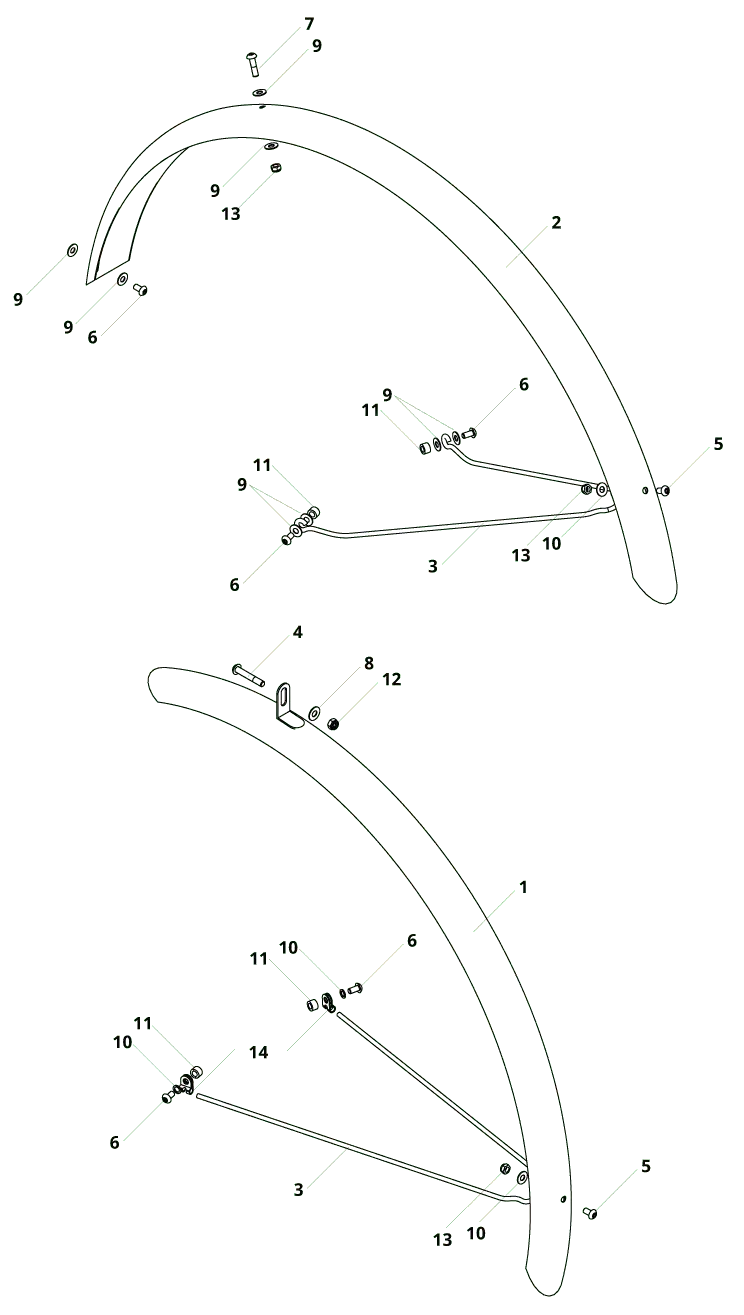
Parts list
1. front mudguard
2. rear mudguard
3. mudguard struts
4. M6 x 50 screw (4 mm Allen key)
5. M5 x 12 screw (3 mm Allen key)
6. M5 x 16 T25 Torx screw
7. M5 x 30 T25 Torx screw
8. washer M6
9. washer M5 large
10. washer M5 small
11. Optional plastic spacer washer
12. M6 lock nut
13. M5 lock nut
14. p-clamp
Also available: sliding bridge for mounting on the brake bridge
Required tools
- T25 Torx key
- 3 and 4 mm Allen key
- 8 and 10 mm open-end wrench
Optional: Drill with ø 5.0 mm metal drill bit
Torque specifications
- M5 screws = max. 5 – 6 Nm
- M6 screw = max. 7 – 8 Nm
Important information before installation
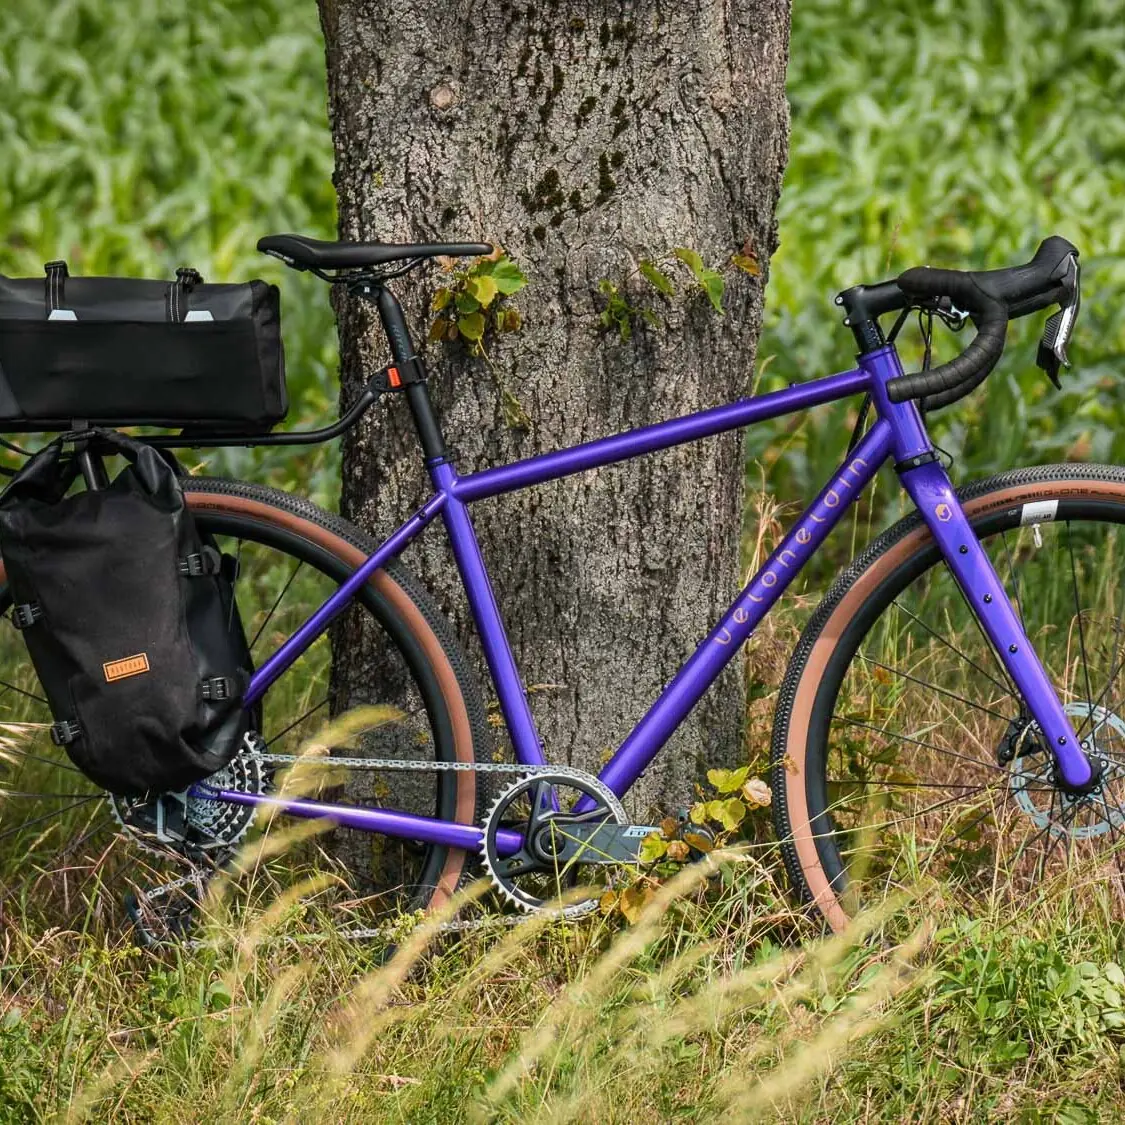
- Depending on the marking, the mudguards are suitable for 700C or 650B tires
- Please check the frame for the necessary eyelets for attaching the mudguards
- Check your frame in advance to ensure that there is sufficient clearance to the tires when attaching the mudguard.
- Follow the installation instructions and contact a professional bicycle mechanic if you have any problems.
1. mounting rear mudguard
Before you start mounting, first check the optimum position of the rear mudguard in the frame between the seat stays and chain stays.
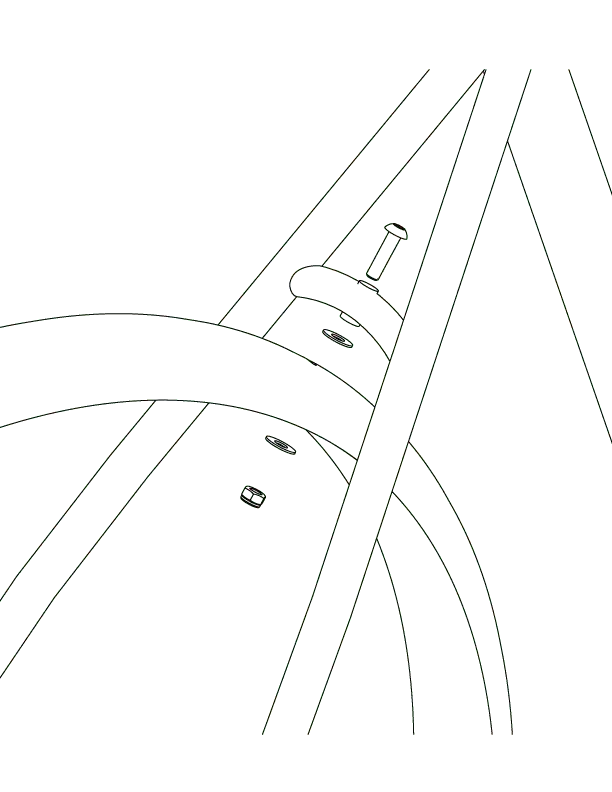
1.1 Mounting on the brake bridge
If the sheet does not yet have a hole, you must carefully drill one with a 5 mm metal drill at the respective mounting point of your frame. Now install the mudguard on the brake bridge as shown in the picture.
If your brake bridge has a horizontal hole, you will need to use a separately available sliding bridge for installation.
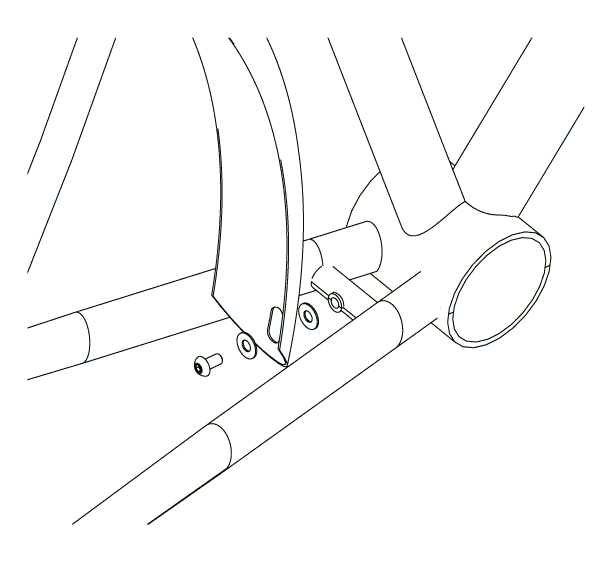
1.2 Mounting on the chain stay bridge
Now the plate can be screwed into the thread on the chain stay bridge as shown in the picture. Use medium-strength screw adhesive to secure the screw in the frame.
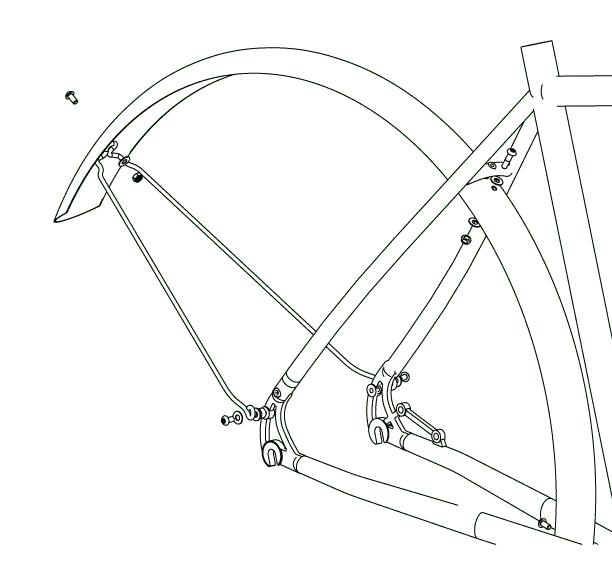
1.3 Fitting the mudguard strut
The final step in fitting the rear mudguard is to attach the mudguard strut to the plate itself and to the frame.
Optional spacers can be used on the frame if no luggage rack is fitted. Use medium-strength threadlocker on the threads here too.
Info
Depending on the distance to the tire or to reach the eyelets on the frame, the strut can still be adjusted by bending it slightly.
2. mounting front mudguard
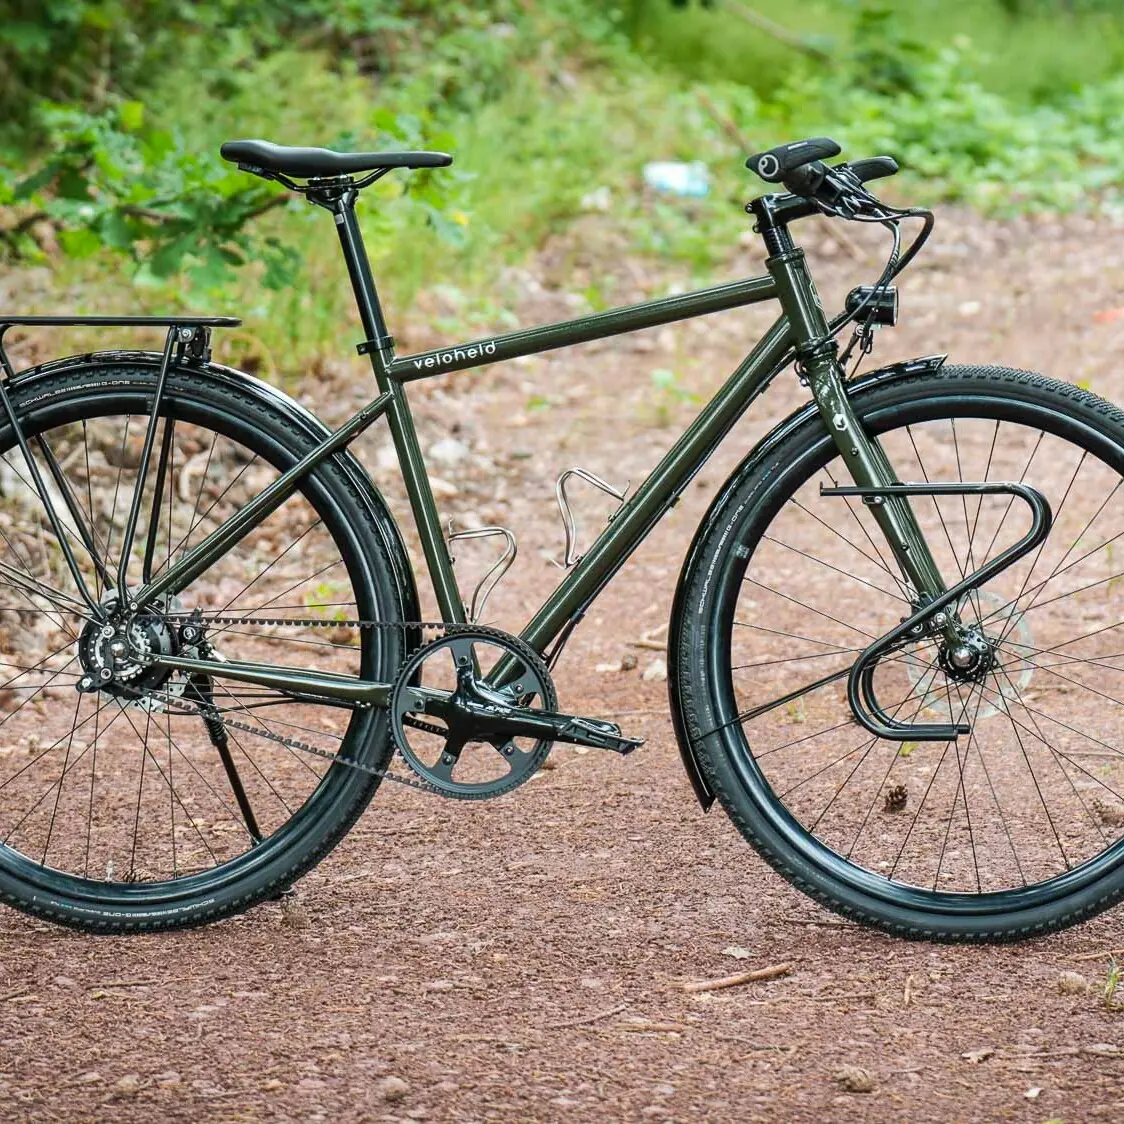
Before you start mounting the mudguard, first check that it is in the optimum and secure position in the fork and over the tire.
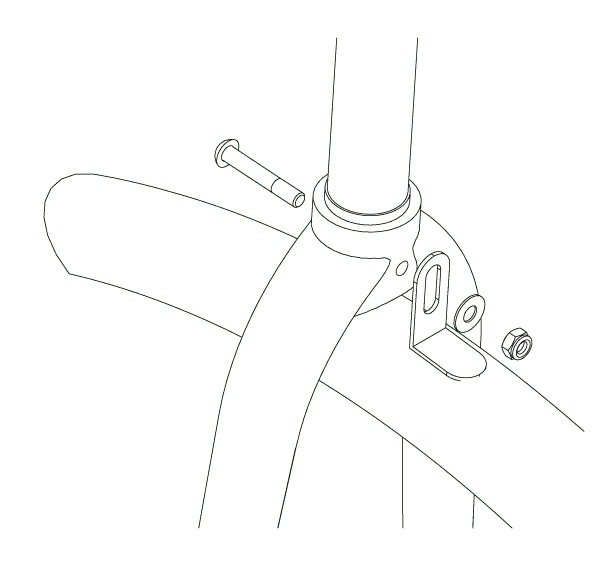
2.1 Mounting on the triple clamp
Fit the bracket of the front mudguard to the fork from behind. Depending on the use of a front light, you may have to use a different screw, which is not included in the scope of delivery.
Optionally, you can use the plastic clamp to guide the brake cable behind the fork.
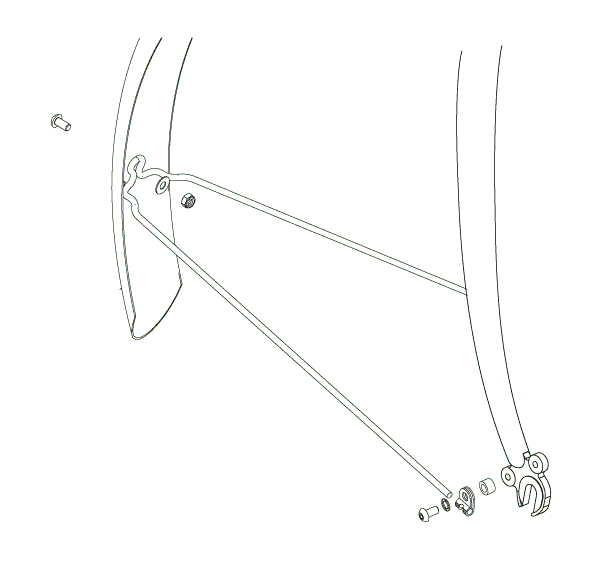
2.2 Mounting the mudguard strut
Here, too, the strut is first attached to the sheet metal before being attached to the dropouts of the fork with a little medium-strength screw adhesive. Optionally, you can use the spacers supplied so that the mudguard struts do not come into contact with the brake calliper of the disc brake. If you do not use these, check the length of the bolts and replace them with shorter ones if necessary so that they do not come into contact with the brake disk and/or wheel!
Info
To optimize the distance to the tire, the strut can be adjusted by moving it slightly in the clamps at the dropouts before they are bolted in place.
Attention
Depending on the mounting option, you will need different bolt lengths, washers, spacers and nuts, which are not included in the scope of delivery.
Beware of the risk of accidents! Make sure that no parts (e.g. screws that are too long) can touch the brake disk, the tire or the spokes and cause blocking!
Important information during use
- Regularly check all screw connections on the mudguards and to the frame and fork.
- Always ensure that there is sufficient clearance between the mudguards and the tire so that no objects picked up from the road can get caught between them.
- Do not mount any other products directly on the mudguard.
Do you still have questions?
Are you unsure about the structure? Do you have questions about the individual steps? Or do you need help in general? Contact us or get in touch with a professional two-wheeler specialist!
0351 212 952 95
Mon. - Fri. 10:00 - 17:00 O'CLOCK
