


What do you need? First of all, a chair to keep your posture in your enthusiasm, then this plan and some time for the crucial steps. A cool drink will help you get through tricky situations and celebrate the build in style.
If you have a mounting stand, clamp the bike to it. If not, get another person to help you or make sure that the bike is standing securely during assembly.
You will need the following tools:
- Scissors or cutter
- Allen key set, especially with sizes 3, 4, 5 and 8 (in conjunction with a torque wrench, e.g. the veloheld Torque Tool)
- Air pump
- Assembly grease as required

Always use a torque wrench to avoid overloading the screws and components.
1. open the box and remove the packaging material
Carefully open the shipping carton and remove the bike and the supplied accessories. Make sure that the frame does not come into contact with the metal clips on the box. Put the box to one side so that you have enough space for further preparation.
Ensure a secure footing and remove protective and padding material from the bike. Use scissors or a cutter if necessary. If the handlebars are loose, make sure that they do not hit the frame or fork. The best thing to do is to get a friend to help you.

2. mounting the handlebars
Now turn your attention to fitting the handlebars. This must be installed in the correct position. Make sure that the fork is not turned the wrong way round. Of course, the type of handlebar plays a decisive role in correct adjustment. If the handlebars are straight, your hands should rest on the brakes in line with your arm and form a straight line. If your bike is equipped with racing handlebars, the last, flat section of the handlebars should be as parallel to the ground as possible.
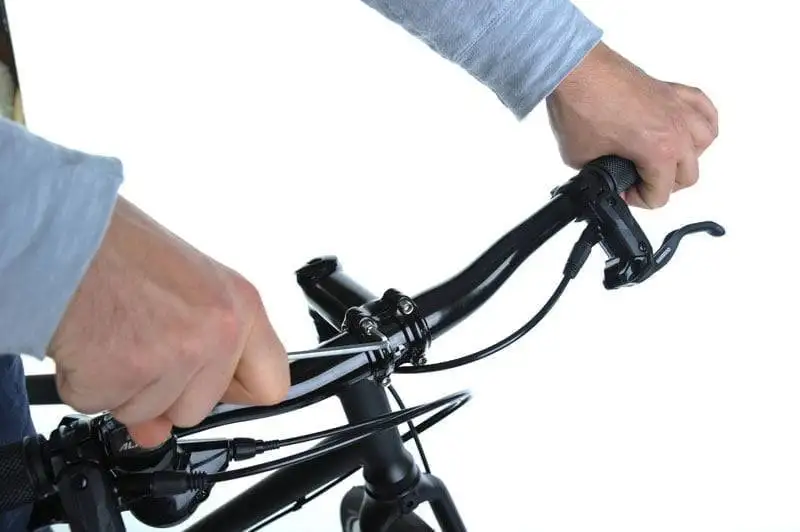
The handlebars are already mounted on the stem?
Make sure the bike is stable and now loosen the stem bolts on the steerer tube using the 4 or 5 mm Allen key. Now align it with the top tube in the direction of travel and adjust the angle of the handlebars if necessary. Then you can tighten all screws on the stem evenly again with 5-6 Nm.
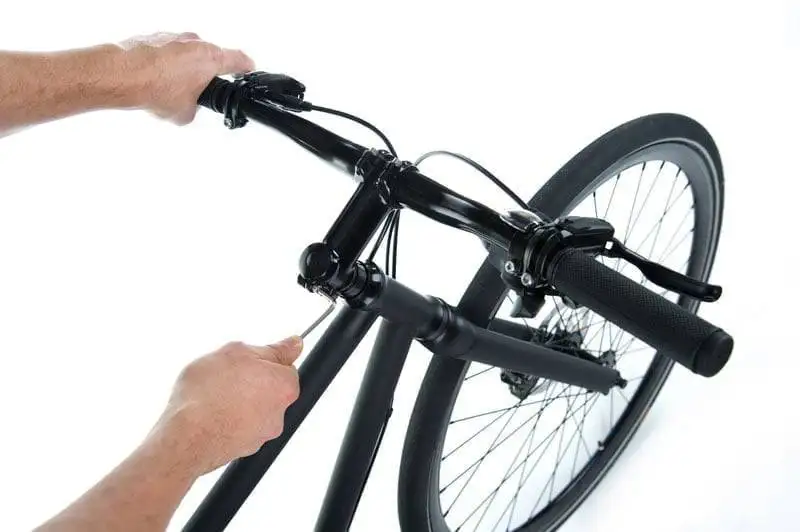
The handlebars are not mounted on the stem?
The stem is already mounted in the direction of travel and only the handlebars need to be installed in the stem. To do this, loosen the screws on the front cap, install the handlebar in the center of the stem and align it at an angle before tightening the screws evenly crosswise with 5-6 Nm.
For both variants, please check the bearing play of the headset afterwards. To do this, pull the front brake and move the fork forwards and backwards. If you notice any play in the bearing (be careful, you will also feel a slight play in the brake pads), after loosening the stem bolts again, the Ahead cap on top must be tightened slightly clockwise with a 5 mm Allen key. Now reattach the stem bolts and check again that the bearing is rattle-free.
You can find more detailed information on the subsequent adjustment of the steering center here.
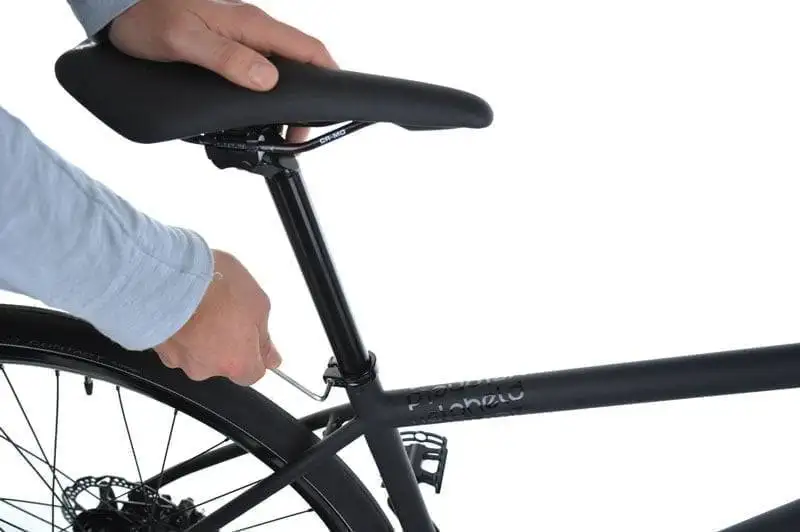
3. mounting the seat post with saddle
The saddle is already in its correct position in the frame and only needs to be adjusted to your individual height. As an initial height reference, we recommend transferring the saddle height from your old bike. To do this, measure from the center of the bottom bracket to the top edge of the saddle in the middle of the saddle and then transfer this height to your new Veloheld. First loosen the bolt of the seat post clamp on the frame with the 4 or 5 mm Allen key and tighten it again with 5-6 Nm after adjustment. During this process, make sure that the seat post is not pulled beyond the maximum mark.
To prevent corrosion, we recommend re-greasing the seat post in the seat tube at least once a year. You can also use assembly paste, which additionally reduces the clamping forces.
How do I adjust my saddle and handlebars to suit me perfectly? You can find out more here.
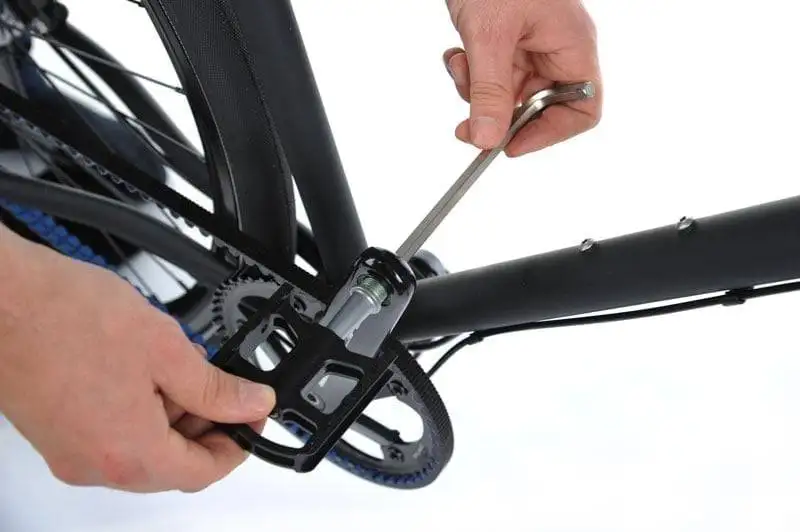
4. mounting the pedals
Next, you can remove the pedals from the supplied box and mount them. If you are using your own pedals, please use these. Please pay attention to the labeling on the pedals or on the packaging. A capital R means that these pedals are screwed onto the right-hand crank arm. A capital L means that these pedals are screwed onto the left crank arm. The indications “left” and “right” always refer to the driver’s perspective, i.e. the way you look at the crank from above. Please check the crank threads and apply a little grease there. Now use the 8 mm Allen key and tighten the respective pedals with a torque of 35 Nm.
With some cranks (e.g. SRAM), the washers supplied should be placed on the threads before fitting the pedals to prevent any damage to the cranks.
5. last tips for a safe start with your new veloheld bike
Now you're almost ready to go. We have summarized the most important checkpoints for a safe start for you below.
- Check the seating position and adjust it to suit you if necessary.
- Have all screws been tightened to the correct tightening torques?
- Is there enough air in the tire?
- Are the wheels firmly bolted to the frame?
- Are any quick-release levers closed correctly?
- Is the lighting system working?
- Check the brake system. Does the lever have a pressure point? Is the hydraulic brake system tight or is fluid leaking?
- Is the chain/belt tensioned in accordance with the installation instructions?
- Are the mudguards permanently fitted?
Please first test the braking effect of your new veloheld bike away from normal road traffic on flat terrain to familiarize yourself with it. The same applies to the circuit. Once you have gained a “feel” for the deceleration and gear changes, you can move the bike in traffic.
Please use our bikes in accordance with the areas of use specified on the website of the respective bike. The total weight, i.e. rider and luggage, must not exceed 120 kg. Excluded from this are veloheld.path and veloheld.iconX, which have a system weight of 140 kg.
If you need a higher system weight, please contact us and we will discuss the possibilities (e.g. more stable wheels etc.).
Please wear a helmet every time you ride. The safety-relevant aspects are now well known. Furthermore, you should always carry a lock and, if your bike does not have permanently installed lights, StVO-approved lights. And for even more safety, we recommend reflectors in the spokes and a bell.
…then go!
Do you still have questions?
Are you unsure about the structure? Do you have questions about the individual steps? Or do you need help in general? Contact us or get in touch with a professional two-wheeler specialist!
0351 212 952 95
Mon. - Fri. 10:00 - 17:00 O'CLOCK
