


To adjust the saddle height, position and handlebar setting of your new veloheld, please follow these steps. So your bike is efficiently and safely adapted to you.
The following tools are required
- Allen key in sizes 4 and 5
- Torque wrench for the correct tightening torques
- Spirit level and plumb bob
Adjusting the saddle height
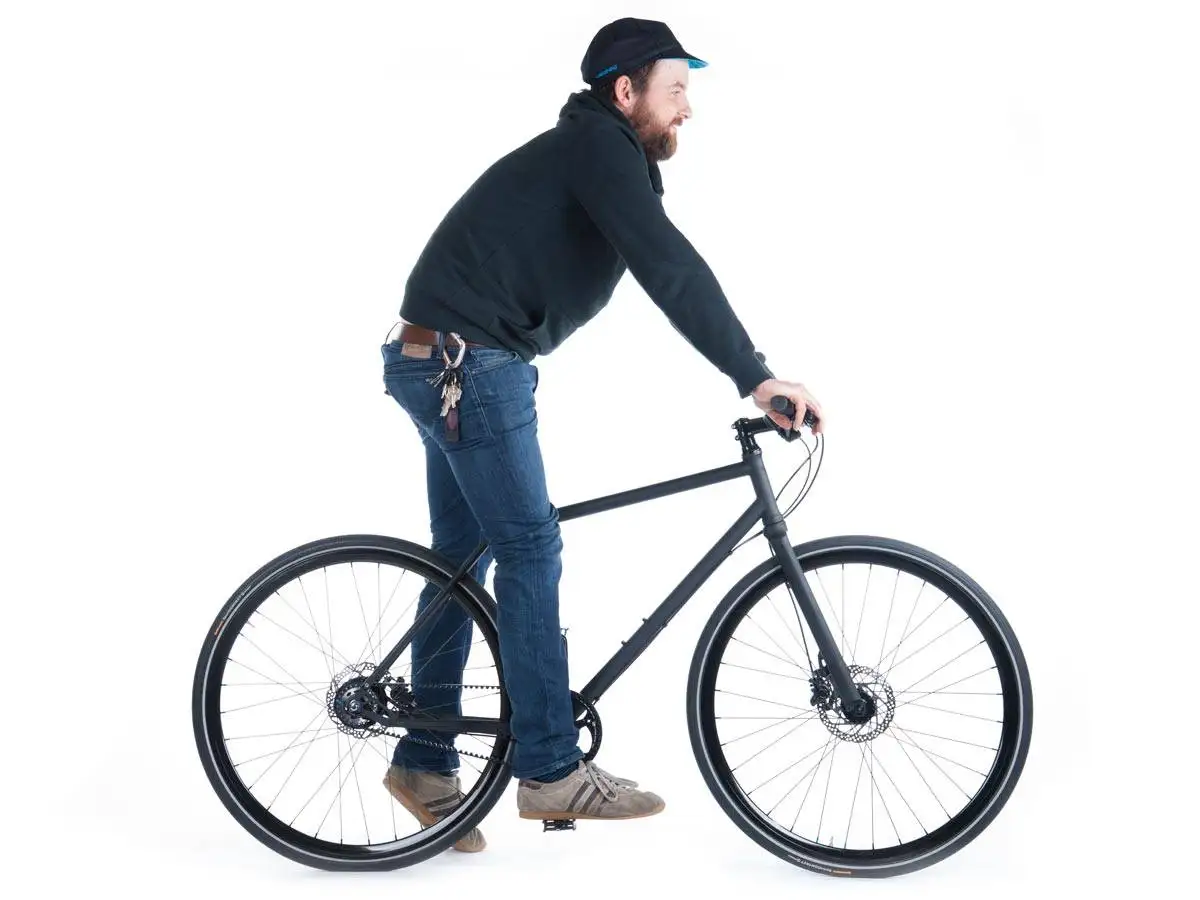
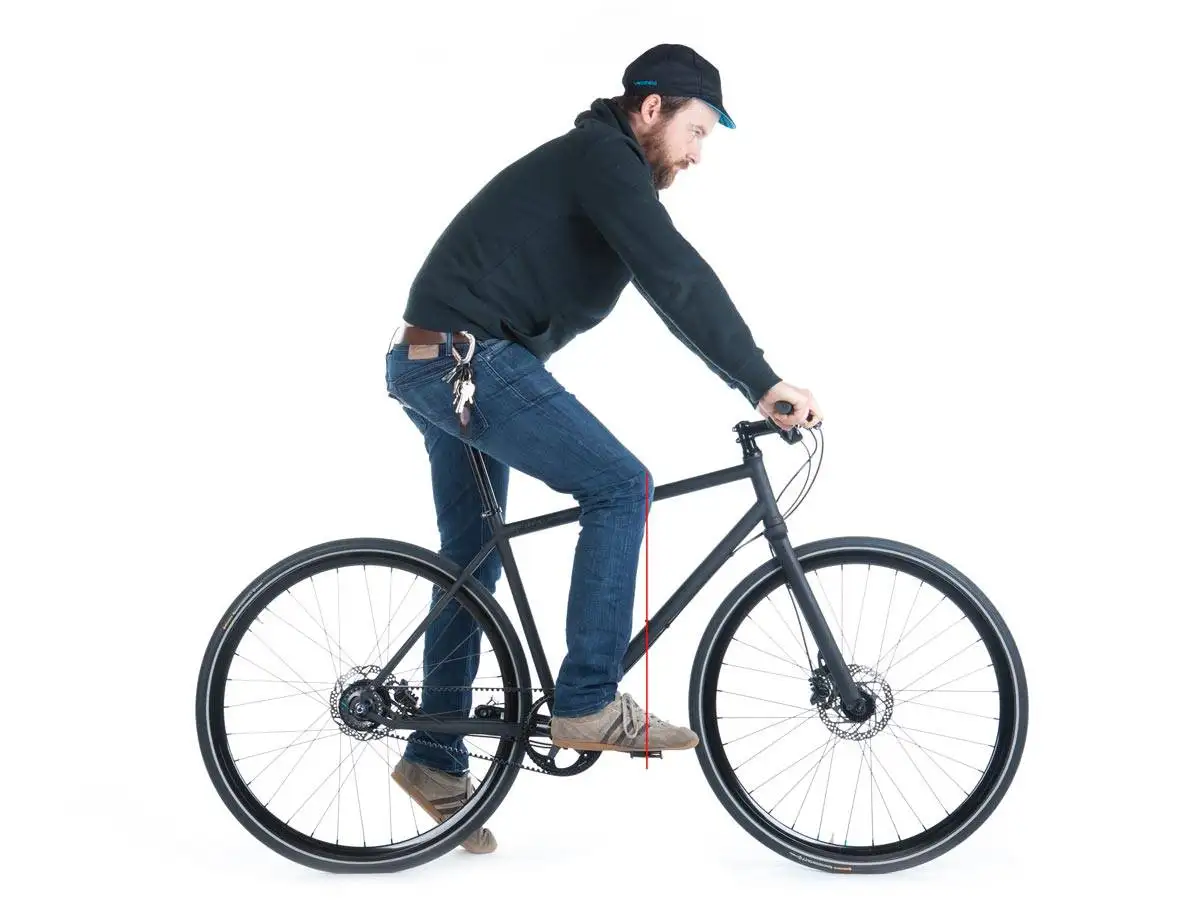
You will find the most ergonomic position on your new veloheld.bike as follows: Sit on the horizontally aligned saddle and place your heel on the pedal in the lowest position. Now you should reach the pedal below with your hips straight and your leg almost straight.
You can use the 4 mm Allen key to open the seat clamp and adjust the height of the seat post. Once you have set the correct height, make sure you tighten the saddle clamp to the correct torque of 4 - 6 Nm.
Adjusting the saddle position and angle
To adjust the saddle horizontally and in inclination, you need to loosen one 6 mm or the two 5 mm Allen screws underneath the saddle mounts. Now move the saddle until you can make a perpendicular from the kneecap through the ball of the foot and the pedal axle with the front crank arm in a horizontal position and the ball of the foot exactly above the pedal axle. Adjust the horizontal setting accordingly. The optimum saddle angle is horizontal to the ground. The best way to check this is with a spirit level. If this does not lead to the desired seating comfort, try to find your individual saddle angle by gradually changing the inclination. Once the adjustment is complete, ensure that the Allen screws under the saddle are tightened to a torque of 9 - 10 Nm.
The cockpit setting
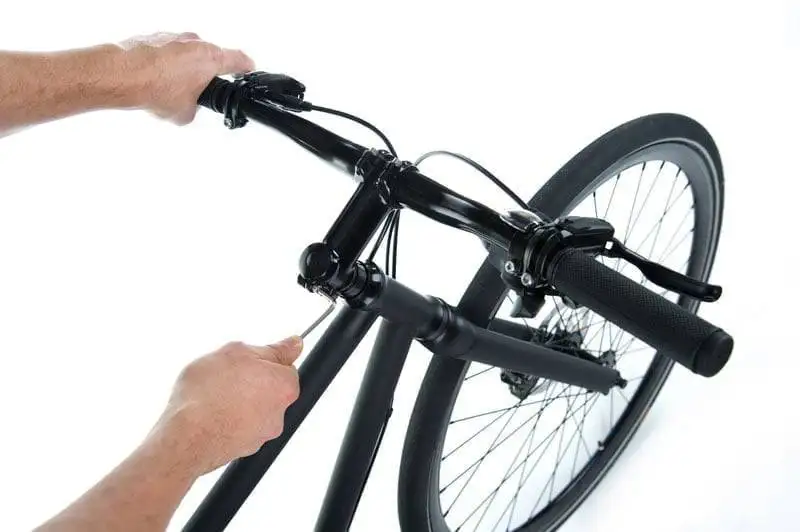
The handlebar height on veloheld.bikes can only be changed to a limited extent due to the "Aheadset" headset used:
1. reducing the height of the cockpit by removing the spacers under the stem or
2. reversed mounting of the stem, resulting in a different stem angle (-/+ 6 degrees)
To do this, loosen the 5 mm Allen screw at the top of the steerer tube and remove the Ahead cover. Now gradually loosen the screw on the side until you can pull the stem off the shaft. Now remove one or more spacers and place the stem back on the steerer tube, aligned with the front wheel and pointing forwards. You can put the removed spacers back on top of the steerer tube. Once you have found your optimum steering height, you can have the steerer tube shortened by a specialist. If the handlebars need to be set even higher, the stem can be mounted upside down (+/-6°). To do this, the handlebars must be removed from the stem by removing the front handlebar clamp and reinstalled originally after turning the stem around. The last step here is to fix and readjust the steering bearing. To do this, place the Ahead cap back on the stem and tighten it gradually with the Allen screw so that the handlebars can still be moved easily when turning the stem and do not jam. The fork must not have any play when braking!
Do you still have questions?
Are you unsure about the structure? Do you have questions about the individual steps? Or do you need help in general? Contact us or get in touch with a professional two-wheeler specialist!
0351 212 952 95
Mon. - Fri. 10:00 - 17:00 O'CLOCK
